Tuesday, February 10, 2015

Cameras, Adapters & Infinity Focus

I'm not sure where to start.

My experience only covers Takumar M42 and Pentax K and M series lenses, there we go, I've started.
Whenever an adapter is being used there is a good chance that infinity focus will either be short or long, sometimes spot on.
You can open the proverbial "can of worms" when you start adjusting a lenses infinity stop position. If you intend to use the lens on more than one camera, it needs to work on all of them.

I've spend hours upon hours adjusting M42 lenses to suit my old Pentax k100d. I prefered the mechanical attributes of the "flange" type adapter rather than the genuine design.
The Flange type moves the lens forward by the flange thickness, meaning you wont reach infinity.

The following pictures show how the adjustment is done.
This procedure does not apply to at least the Takumar 200mm f4 Tele. it is the easiest to adjust with three screws around the outside of the focus barrel.


You first need to find something, eg a bottle top that will touch the "name ring" but clear the threads when wrapped with a rubber glove. An M42 rear cap works well.

Then hold the lens in one hand twist the name ring with the other counter clockwise. If its been off before it will turn easily, if not it won't. 
You may need to push and twist quite hard.


This is what should happen, once it's loose you can just spin it off with your gloved finger, this is when you find out if the filter threads are damaged.


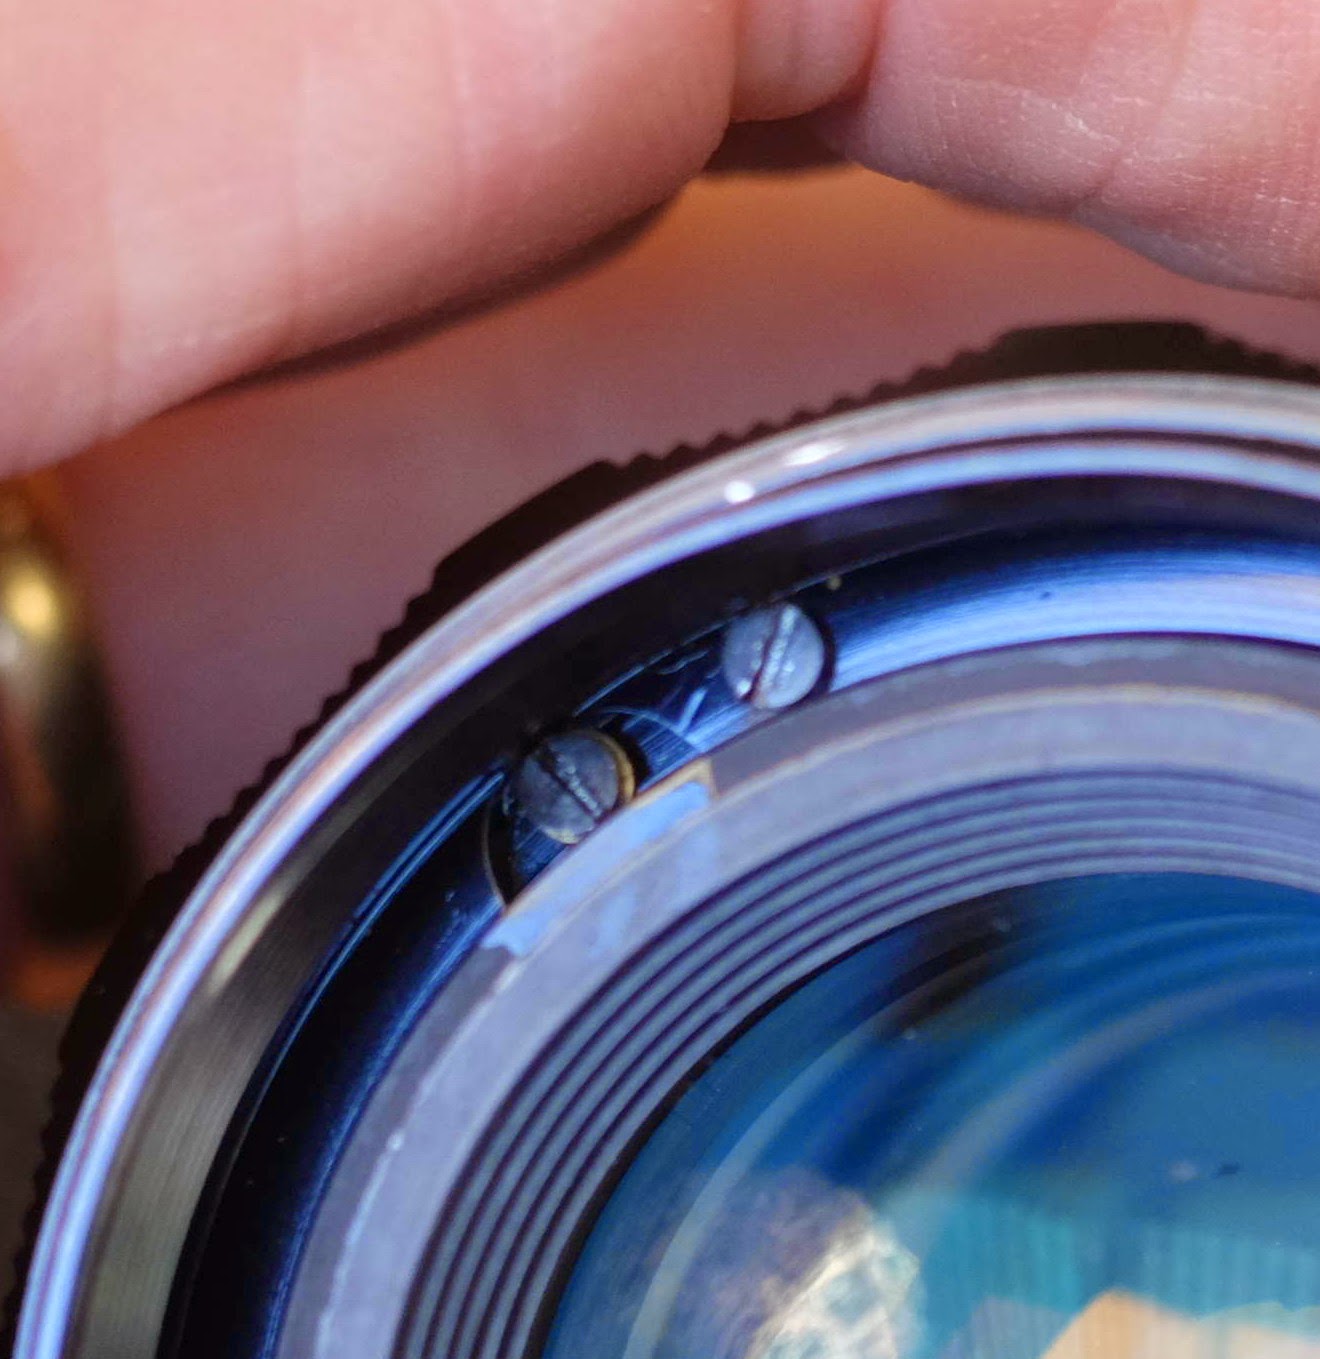
There are three screws that hold the filter ring on, one of them is shown on the left pic, not the ones in the cutout.
These are often cross head screws in the later Pentax lenses, you need to equip yourself with various small screwdrivers and sometimes grind ones to fit. undo these three and the lens nose lifts away.
To make life difficult these screws often have some locking vanish on them, if so, try a tiny bit of Nail polish remover, or acetone. Sometimes a tap on the end of the screw driver will crack the varnish, these can be tricky. If you have no affinity with tools best not to try this.


Now you can see three more screws. The right hand picture shows one of them screwed into the brass helli-coil at the bottom.
Loosen all three the focus ring will now be loose. Now with a screw driver push the screw and the helli-coil in the direction of infinity, anti clockwise from the front I think, just a few mm then "nip" up one of the screws just a little bit and test, see if you can focus past infinity.
Open your aperture, adjust for perfect focus on something far away, loosen the screw you nipped up rotate the focus ring to point to the infinity mark, nip up all three screws, and you should be good to go.

Another factor is depth of field, with the lens stopped down it may reach infinity, but for me I want to be at focus at the "fast" end of things.

When doing Astrophotography work with my old Pentax camera I could not focus in real time, I had to trust the infinity stop, hence all my mucking around.


With my XT-1 Mirror-Less camera the adapter I use deliberately allows focus past infinity. I've come to realise that being able to "rock" in and out of focus is probably better than aiming for perfect focus when hitting the infinity stop.

It also has a tilting rear display. I don't normally use this display as I like viewfinders. For Astrophotography though, it's fantastic for real time positioning and focusing with the camera pointed skyward.


Thursday, January 29, 2015

Wide Field Astro: Fujifilm XT-1

We recently spent a few nights at St Andrews Beach in Victoria Australia. This provided me with some nice dark skies to try out my new "wide field" technique.
My new Fujifilm camera has a low noise sensor, this allows me to use a fixed tripod instead of a tracking motor drive.  As field rotation is now in play, your exposure time is of course limited, I can use around 7 secs with a 28mm lens, probably more depending on where your camera is pointed, near or far from the Celestial pole. The nearer the pole the less rotational movement.

I was quite surprised how well this one turned out.


Eta Carina Nebula Approx 8000 light years away and 450 light years across.

Fuji XT-1 Camera. 12800 ASA. Noise reduction -2
38° 25' 45.5628'' S  144° 50' 44.3040'' E
Takumar 200mm f4.  15 x 2 second exposures. Stacked with Regim, Post Processed with "Gimp" . On a Fixed Tripod.
 Cropped and compressed.


Milky Way (part of it)
The big black thing in the foreground is a tree.
FujiFilm XT-1 and Pentax M 35mm f2.8 lens at f3.3 15 x 6 sec exposures .
Stacked in "Regim" post processed in "Gimp"  


Same settings as for 200mm above but at 25600 ASA. The stars begin to elongate sooner the further away from the celestial pole that you point your camera.


 M42 Nebula in Orion.


Wednesday, January 7, 2015

Wide Field Astro-Photography

For a couple of years now I've been dabbling in "Wide Field" Astro-photography.

What's all that about you might ask, quite simply it's taking pictures of the night sky without a telescope.

In Wide Field we use a Digital or Film Camera and generally a "Normal" or "Wide Angle" lens.
We then take multiple exposures of the same area of sky and using freely available software use a technique known as "stacking" to generate an image of lower noise and higher clarity.

With the camera I had, I also needed a motorised "Equatorial" Mount, which you would also need if you used a film camera.
Once you point a camera at the night sky and take a few long exposures you realise how fast the Earth is spinning, 1670 km/h or 0.5 km/sec at the equator,  you need to compensate for this rotation with your mount.
As the sensitivity of my camera was not very high, I needed to take exposures of around 40 seconds for each frame, this adds considerable complexity to the whole process.

You Need
  1. Somewhere away from city lights, so you may need to use batteries for everything.
  2. A motorised EQ mount correctly aligned, pain in the backside.
  3. An external power source for the camera, as the camera will chew through batteries in no time.
  4. Most likely a programmable remote trigger for the camera, so you can set it and walk away.
  5. A computer with free stacking and image editing software, the easy bit.
Big note: If you have a modern high ISO camera you don't need much at all.

I'm very happy to say I now have a new camera, a Fujifilm XT-1 which has a very sensitive and sharp sensor, also a built in exposure timer, and the list goes on.
Through the use of an adaptor I'm still using my collection of excellent vintage Pentax Prime lenses. I cannot speak highly enough of this camera. More on this camera soon.

In most cases I can now get away with just the camera, a tripod and a few spare batteries, making it a lot easier when I come across some dark skies.


This is an old picture of my home made mount. The camera is my old trusty Pentax fitted with a Pentax M 135mm f3.5 telephoto.
The Aluminium box contains a 6.5v regulator to power the camera and stepper motor driver and oscillator electronics to make it all go. It all runs off a 12volt gel cell battery.
The "Sector Drive" as they are sometimes known, is mounted on a modified "Meade" Tripod.


The example below was taken in Beechworth, Vic, Australia.
36° 21' 49.4820'' S   146° 40' 43.6872'' E
Southern Cross and Eta Carina Nebula NGC 3372
 Using a Pentax K100d Super and a Pentax K 50mm f1.4 @ f2.8  400asa 20 x 40 sec exposures
 On my home made EQ mount. Stacked with "DeepSkyStacker"


Below was taken at Pt Lonsdale, Vic Australia. 
Southern Cross and Eta Carinae Nebula
You will notice the stars look elongated at the edges of the image, this is caused by Lens "Coma" I have yet to use a lens wide open that doesn’t  exibit some amount, it would have been gone at f 2.8.

Pentax M 50mm F1.4 @ f2 400asa 40 sec 10 exposures


The picture following is an example of very bad coma. This may not be representative of this model lens.


An example of very bad "coma" 35mm f2 Takumar @ f2


The following is a composite of 5 images from Lady Elliot island. On the night I remember the view was in fact rotated 90 degrees to the right, or from the Horizon to the Zenith. It's a very big picture heavily compressed for web viewing,  Same setup as above, but 800asa 20 second exposures. The bright cluster just in the top corner of the topmost frame, is Omega Centauri NGC 5139 about 10 million stars and 15,800 light years away. A "light year" is the distance travelled by light in a year, or  9.4605284 × 10 to power of 12  kilometers.


Lady Elliot Island
24° 6' 55.6236'' S   152° 42' 56.5992'' E


The image below is my first impromptu attempt at using just the XT-1 camera and tripod.
It's quite heavily compressed for web viewing.
Still playing around with camera settings, but you get the idea. More to follow.


This one is taken at Walhalla Vic Australia (Very Dark)
with the Fuji XT-1 Pentax K 28mm f3.5
 6 x 5 sec exposures at 12800 ASA stacked with DeepSkyStacker


Its summer now, so time to look at "Orion". This is know as M42 a nebular in Orion.
The following is taken from our back garden in Melbourne Australia. Light pollution is 
A big problem at this location.

 Takumar 200mm f 4 lens on my wonderful Fuji XT-1. 
15 x 1 sec exposures at 12800asa at f4. on a fixed tripod. stacked using
Regim a Java based Astro Program
Followed up with some Wavelet Noise reduction in "Gimp"


When the Moon's so bright it spoils things for you, take a picture of it.
  
Fuji XT-1 200mm Takumar. 200 ASA. f8. 1/170 sec Cropped